Columns

Product Information
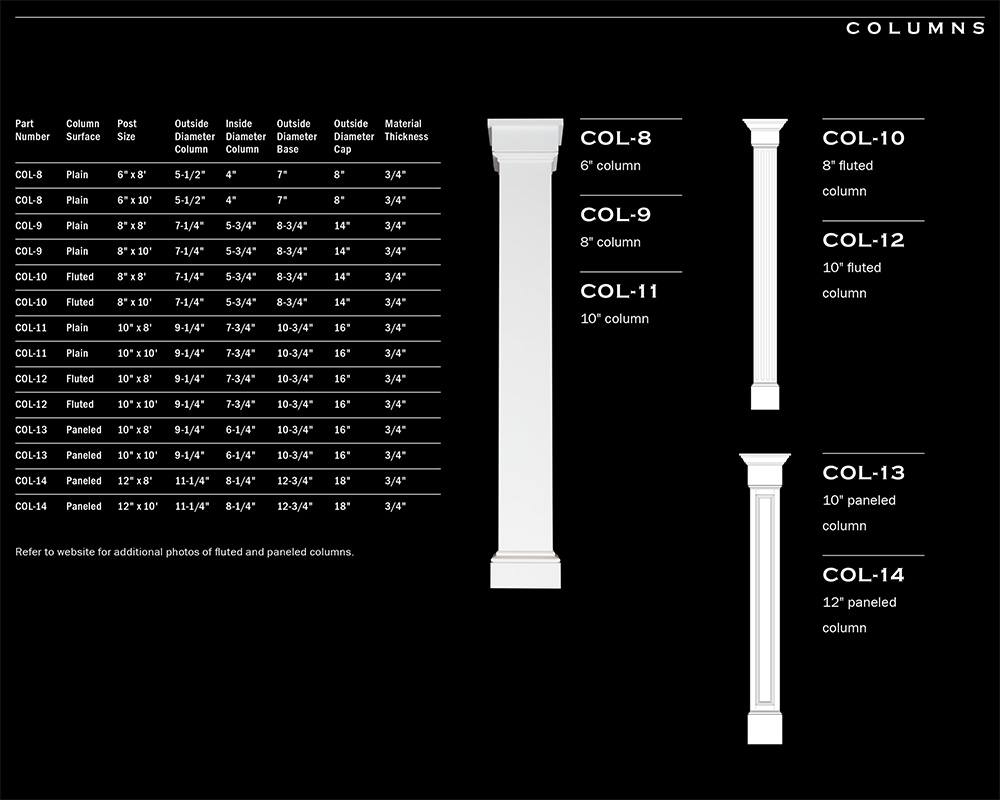
Installation of our 3 & 1 columns is so quick and effortless, a novice installer will look like a pro at the end of the day (and a pro can go even faster). Your columns will arrive with three sides welded together from the factory, allowing you to simply slip the three-sided column around the existing column support and complete the job by easily affixing the fourth side. As with all Trim Solutions products, you have several styles to choose from to achieve the architectural style that best suits your home. Click here to Download/Print our Columns Flyer.
Finally, a low maintenance exterior PVC trim with architectural integrity your clients can count on.
- No Face Nailing
- High-Quality Cellular PVC
- No need to paint or caulk
- Made in the USA
Instructions for 3 + 1 Columns
1. Measure the height of finished post in the field.
2. If the column needs to be cut to length, remove the base and set aside.
3. Notice that the column is glued together on 3 sides with one side loose. A separate loose side from glued sides.
4. Cut column sides to the desired length.
5. First slide in the 3 pc. column section, then apply supplied glue in lock mitre joint from top to bottom while getting none on the face of column. Install clamps on column as needed (every 24”). Slide down the top cap, exposing pre-drilled holes, and install screws through column and into porch beam. Place drops of supplied glue every 2-3” on top cap, then slide into top plate and hold for 10-15 seconds.
6. Once top cap is secured, plumb column down and mark on floor surface. Slide bottom cap up and install supplied screws through attached brackets to floor surface. Once secure, apply supplied glue to several areas on bottom of column all 4 sides, slide down cap and hold for 10-15 seconds.
CAREFUL OF GLUE… IT SETS VERY FAST… SEE BOTTLE FOR DETAILS.
Demo Video
Product Documents
Connect With Us![]()